Your yard is an extension of your home, so customizing it to fit your personality and lifestyle is a perfectly logical move. Of course, the more time, effort and money you put into your home’s exterior, the more you stand to lose to winter’s annual wrath. If you live in an area known for harsh winter weather, going above and beyond the basics could save you a great deal of restoration come spring.
For many people, winterization begins and ends with a final mowing and raking. Though this is an important part of the process, it also leaves your plants, wooden structures, hardscapes and other outdoor components to fend for themselves. Their fate is in your hands, but what steps do you take to keep them safe from the elements? While your lawn needs its fair share of attention before the cold sets in, all those other components are not to be overlooked.

Basic Fall Lawn Care Essentials
Mowing is an art form requiring more precision than most people realize; fortunately, the majority of today’s mowers take all the guesswork out of the process. Many people give in to the urge to simply lop their grass off as close to the ground as their blade height will allow once the first tinge of fall enters the air. From the perspective of lawn health, this isn’t the best approach.
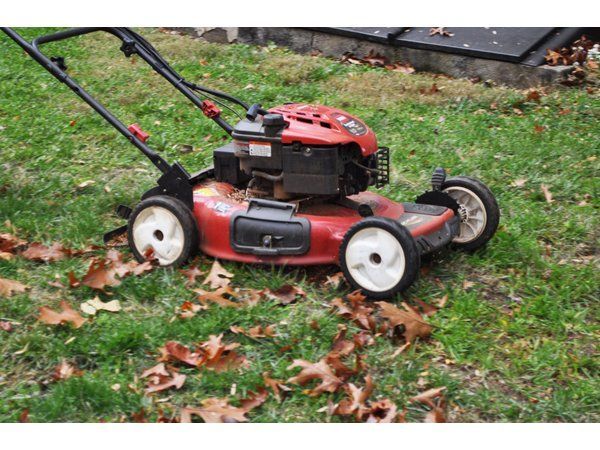
As a general rule, you should cut your grass slightly shorter with each mowing once cooler weather begins to set in, being sure to aerate and fertilize the lawn at some point during that time. Doing so will give your grass much-needed nutrients to feed on throughout the winter without killing it from the shock of sudden and dramatic length loss. Your final mowing at the lowest blade setting should take place near the season’s first freeze, which is typically when grass stops growing.
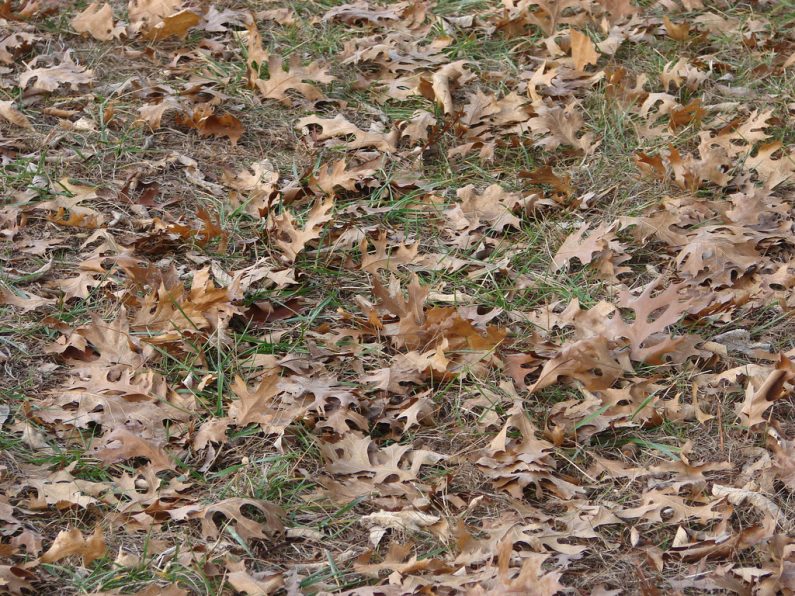
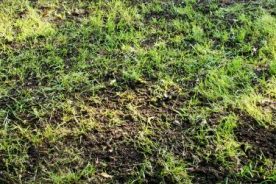
Be sure to skim those hard-to-reach edges and corners with your weed eater one last time as well. Rake up any dead leaves and grass clippings; otherwise, you’ll have sunlight-deprived patches and areas exposed to the excess moisture organic materials are known for holding onto. Keep a regular check on your lawn to ensure no straggling leaves are allowed to build up after the fact.
Outdoor furniture and random objects like toys, gardening tools and flower pots also need to be stowed away following the last mowing of the season. Like leaf piles, these items block sunlight and hamper air circulation. As a result, they’re notorious for leaving pitiful brown, yellow or even bare spots scattered across your grass.
Plants and Shrubs
Although fertilizing your lawn before cold weather tightens its grip is crucial, the opposite could be said of your plants and shrubs. If you spread a layer of fertilizer on these landscaping components, you actually run the risk of damaging them. Despite the burgeoning nip in the air, fresh fertilizer stimulates renewed growth in flowers, veggies and shrubbery, and these tender shoots make the entire plant more vulnerable to the cold.
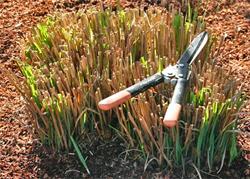
During your winterization efforts, prune dead or damaged limbs from your trees and woody plants, so they’ll be ready to sprout afresh when warmer weather returns. If you plan to transplant shrubbery around your home, this is the time to do so. Also take a few moments to remove broken or withered growths from your perennials. After the year’s first frost, you’ll need to clip annuals at ground level, leaving their roots in place to nourish other foliage planted nearby.
Vegetable gardens also need a certain amount of care when cold weather threatens. Any healthy growth left in place can be tilled under to enrich the soil for next year’s planting. Autumn crops, like cabbage, greens, turnips and onions aren’t in danger until the first major frost appears.
Whether you’re prepping flower or veggie gardens, take care to check their leaves and stems for hazards. They’re potential harbingers of insect eggs, fungus and other issues. Root rot is a common problem known for leaving plants looking dry and withered. Some other warning signs to look out for are:
- Brown spots surrounded by yellow discoloration on leaves
- Unusual lumps or growths near plant bases
- White powder or milky liquid on leaves and stems
- Deformed leaves
- Sticky substances on leaves or unusual patches on their undersides
All these are evidence of fungus, bacteria, viruses or bug infestations. Any plants showing these symptoms should be removed, root and all, from your gardens. Leaving them in place could allow diseases and plant-eating invaders to spread.
Now is also the time to bring in mulch and stock up on garden fabric. Once temperatures drop near the freezing point, apply mulch evenly but liberally around the roots of your plants, trees and perennials, stopping an inch or two from their trunks or stems. At least two inches of mulch is the norm, but between four and six inches is recommended in areas with extended periods of sub-freezing temps. Consider placing mesh or plastic guards around the trunks of young trees and shrubbery to protect them from ice and hungry rodents or insects.
Although some veggies and perennials can weather the cold until the first heavy frost, protecting them with row cover can help extend their lifespans into the first freeze. You can also use this fabric to shield your annuals through the first few light frosts. Rose bushes, young shrubs and trees or other larger plants need to be safeguarded with burlap screens. This breathable fabric will help protect them from wind and cold while still providing access to moisture and sunlight.

Hardscape Preservation
While you’re going over your plants with a fine-toothed comb, extend those winterization steps to their surroundings. Check edging and borders for displacement or gaps, cracks and other signs of wear and tear. Repairing or replacing damaged components will help protect foliage from unwanted grass ingrowth as well as soil erosion and drainage problems come spring.
Paved pathways, sidewalks and other hardscapes need attention as well. Even small cracks have a way of allowing water inside. When this moisture freezes, it expands, causes cracks to grow and may lead to dangerous uneven spots. Catching light damage early on before ice becomes an issue and having it promptly repaired helps keep matters like this from getting out of hand.
Watch Over Your Wooden Structures
Of all the wooden factors in your outdoor living space, your storage shed should be a top priority. Though it may not be the most decorative or fun-filled aspect, it could be considered the most important. It is, after all, responsible for sheltering many of your tools and accessories from the cold and wind.
In the event your shed has a solid fixed foundation like that of your home, look for gaps, cracks, crumbling mortar and other signs of wear. While these may not be immediate threats to items stored inside, they could eventually affect the entire structure. Alternatively, make sure any underpinning is intact and remains properly attached.
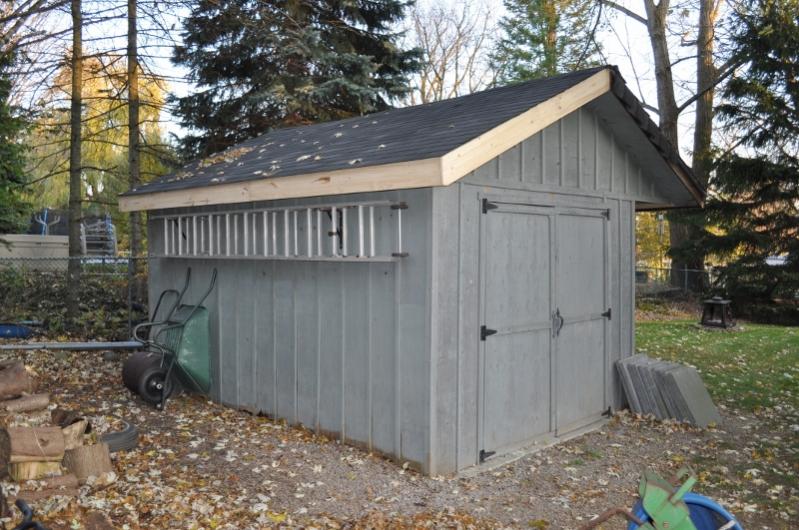
Also give the roof a good once-over. Check for missing or broken roofing materials and inspect the ground around your shed for granules from shingles. Look inside for dark spots, rusting hardware and puddles. Any damage or signs of leaks should be remedied before snow and ice storms hit.
From that point, you can turn your attention to other components, like wooden fencing, furniture, decks, pergolas, gazebos and swing sets. Most structures designed for the great outdoors are built with wood capable of holding up to the elements. Cedar, redwood, cypress and teak all fall into this category.
Those types of wood produce their own defenses against decay, swelling and warping. Insects don’t seem to care for the taste of those natural oils, either. Many experts advise against using synthetic treatments on those species as they can decrease the natural resilience of the wood. That being said, they do tend to take on an unattractive gray hue over time if not stained or sealed.
Yellow pine and white oak are also commonly used for outdoor structures. Though they’re less expensive than the other alternatives, they don’t offer the same ingrained safety net against moisture, temperature changes and termites. They are, however, infused with preservatives to keep weathering and infestations at bay.
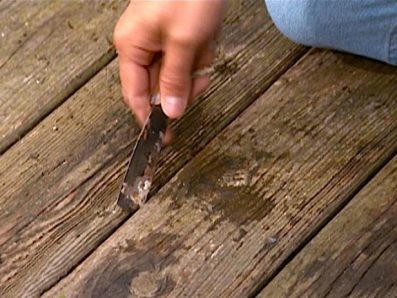
No matter the type of wood used in constructing your furniture, play sets, entertainment areas and outdoor décor, an extra layer of protection couldn’t hurt. Of course, there are right and wrong ways to approach the process. First of all, you should never add stain or sealant to fresh installations. Whether manually treated or naturally protected, they’re likely to reject any applications.
After a year, you can begin thinking about finishing and sealing your exterior wood. Fall happens to be the perfect time for such an undertaking because these substances need to be applied when humidity is low and temperatures aren’t venturing into the extremes. The process takes about a week with the first day devoted to cleaning and the following two or three set aside as a drying period. Once you apply your finish, it needs at least another 24 hours to dry and cure.
Plan all this for a week when no rain is in the forecast, and keep people, pets and objects off the surface for the duration. You’ll most likely need to refinish your wood structures and furniture once every two or three years. Let its appearance be your guide; flaking and dull spots are indicators it’s time to repeat the process.
Try not to leave furniture, planters and other objects sitting directly on your wooden surfaces as they hold moisture in and prevent air circulation. This can lead to decay and discoloration. Remove them completely or shift them around periodically. Should mildew or mold appear on your deck or other wooden articles, clean them with cleansers available at your local hardware store or a solution of water, oxygen bleach and dishwasher detergent.
If you choose to use the homemade cleaning solution, adhere to the specific ingredients listed. Chlorine bleach can damage wood surfaces, and regular dish soap as opposed to dishwasher liquid will leave you overrun with suds. Use only low-pressure sprayers, such as your typical garden hose attachment, to apply cleaners and rinse them away; high-pressure options could remove far more than just the mildew.
Defending Other Types of Outdoor Furniture
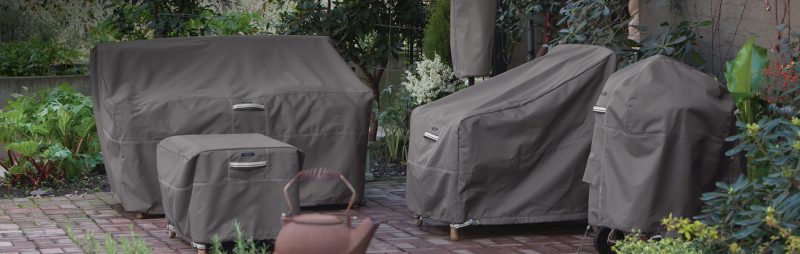
Patio furniture comes in a variety of materials, and each needs its own level of fall care. While plastic options typically need little more than a soapy bath where maintenance is concerned, cold weather does make them a bit more brittle. Manufacturers recommend moving plastic outdoor furniture into your storage building or garage for winter.
Wrought iron is a beautiful and hardy alternative, yet it’s prone to rusting. Oxidation beginning in spring or summer and allowed to spread during colder weather could leave your wrought iron furniture looking quite a bit worse for wear. If you see any rust developing, scuff it away with a wire brush or soapless steel wool pad and touch it up with paint designed for this metal. Cover your wrought iron patio furniture with tarps and secure them with clips so they’ll stay in place.
Aluminum requires little protection or maintenance unless its factory finish is scratched; if so, you can repair the damage with furniture or automotive touch-up paint to prevent rusting. Wicker is particularly vulnerable to the elements, so this delicate material should never be left outside during winter. Fabric cushions on any type of outdoor furniture need to be sheltered until warm weather returns.
Protection for and from Outdoor Water Supplies
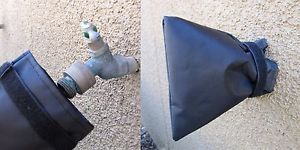
Frozen pipes are among the leading causes of damage for homeowners. In some cases, remedial costs are only covered by homeowners insurance if preventative measures were taken beforehand. Garden hoses need to be disconnected and stored away once cold weather arrives.
Outdoor faucets should be wrapped before the first freeze. Though several layers of newspapers secured with duct tape will suffice for less frigid areas of the country, regular and extensive sub-freezing temperatures require thick foam or pipe insulation readily available at hardware and home improvement stores. If possible, shut off the water supply to these pipes as well.
Winterizing sprinkler systems is considerably more complicated. In general, the process begins with locating the water shutoff valve in your basement or crawlspace. Some are secured in separate in-ground valve boxes. Systems equipped with atmospheric pressure breakers are typically purged of water lingering in their underground lines with an air compressor whereas reduced pressure models could be damaged by using this method.
In either case, consulting the system’s specific owner’s manual or the manufacturer’s website for guidance is recommended. If you’re unsure of which type of system you have or its origins, you’d fare better calling on a professional landscaper for assistance. Should you fail to winterize the system or inadvertently damage it, all your yard winterization efforts could be in vain once repairs come into play.
In a Nutshell
Winterizing your yard doesn’t have to be done in a single weekend. Start by checking your plants for signs of disease, removing dying or damaged foliage and spreading mulch since these are the most vulnerable components of your yard. Once those more time-sensitive aspects have been dealt with, you can move on to inspecting the shed, fencing, furniture and wooden structures for wear.
Repairs can be made gradually as you’re raking, picking up idle objects and moving items into storage. Just be sure to cover sensitive plants, wrap pipes and disconnect outdoor water supplies before the first freeze. Many of these steps are dependent on the typical weather patterns in your area, and your greatest resource in this regard could be the Farmer’s Almanac. This time-honored publication has a way of knowing what’s to come long before weather forecasters’ technology gives its final word.
Customizing your outdoor living space increases your property’s functionality and curb appeal while giving you an entirely new level of enjoyment. Putting in a little extra time and effort before winter rears its frightful head goes a long way toward getting the most out of your investment. Take care of your yard and all that lies therein, and it’ll return the favor with decades of satisfaction.

No Comments