Tired of rototilling your garden every spring (or worse, turning it over with a pitchfork)? Want to save gas, energy, time, and water and increase your yield and the health of your garden at the same time?
The answer is lasagna. What? Noodles, cheese, and tomato sauce? Well, no, but this no-till method of gardening involves laying down layers, as one does when making lasagna; hence the catchy name for the technique.
This method has so many advantages, it is hard to imagine why everyone isn’t using it. Read on, and we’ll explain it all and give you all the knowledge you need to get started with your own lasagna garden!
What is lasagna gardening?
Lasagna gardening was introduced in 1998, in a book by Patricia Lanza, Lasagna Gardening: a New System of Layering for Bountiful Gardens. Lanza was a busy innkeeper and mother of seven, and she just didn’t have time for conventional gardening, which involves lots of digging, weeding, and watering. She started experimenting with creating a garden bed using layers of different materials, and eventually found she was able to reduce the amount of time she spent on garden chores by 60 percent.
While most people associate lasagna gardening with vegetables, it can work equally well for annual flower gardens.
It does take some preparation, so you won’t be able to switch to this method mid-season, but you can start preparing your bed in the fall and be ready to plant in the spring. You can even start right at planting time, but you’ll have to add a final layer of compost to plant in.
Whether you have a large or a small plot, great soil or hard clay, and live in a dry or wet climate, this method can work for you, provided you have available the amount of sun needed by your chosen plants.
What are the benefits of the lasagna gardening layers?
There are many benefits of the lasagna gardening method. Among them are:
- No tilling (this also means no heavy equipment like a rototiller needed)
- No fertilizing
- Less need for watering
- Less weeding
- Can be done in areas with poor soil
- Beds can be established directly over sod with no digging
- Increases the earthworm population
- Can be used to produce raised beds for easy access
- Materials are often free (newspapers, grass clippings)
- Uses materials otherwise wasted (manure, coffee grounds, newspapers)
How do I set up my lasagna garden?
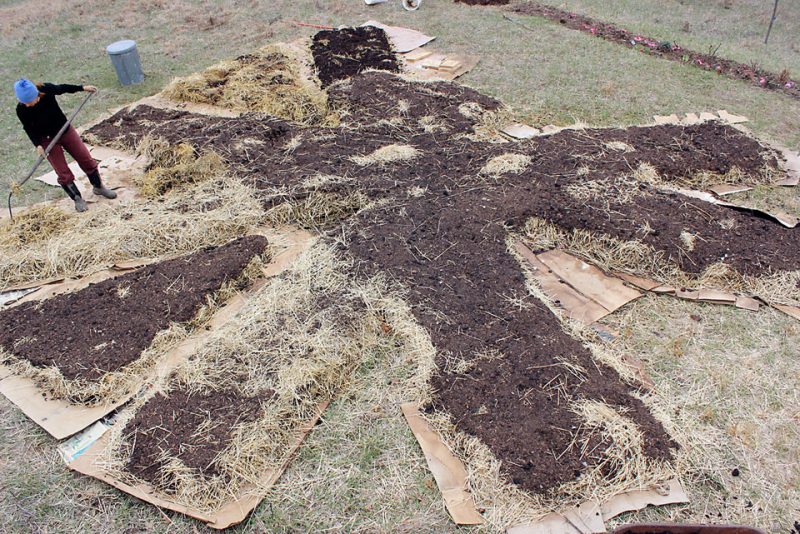
Establishing a lasagna garden bed involves layering different kinds of organic matter. You want three different types of layers: a base layer, green layers, and brown layers.
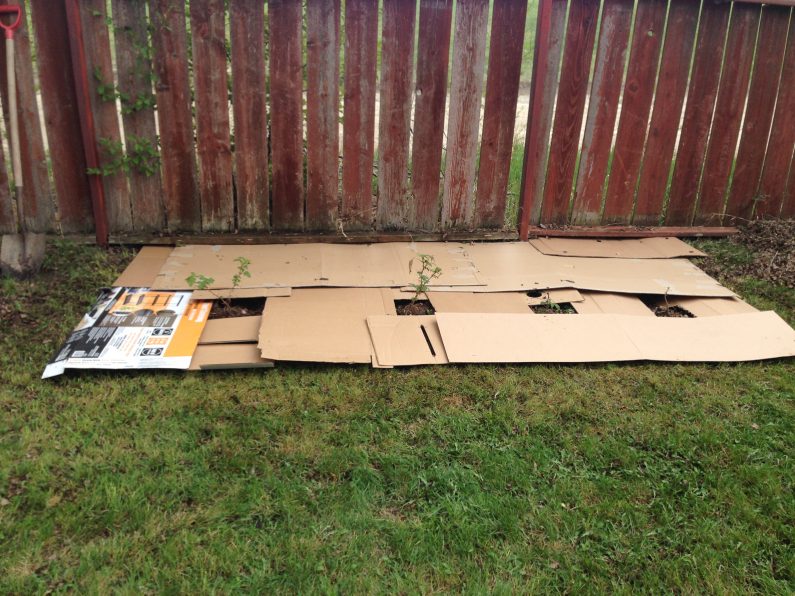
The bottom layer is usually something like layers of newspaper, sheets of cardboard, brown paper leaf waste bags, or even old carpet (be sure it made of biodegradable material, like cotton or wool). The idea here is to smother weeds or sod. This material does need to let water through and be biodegradable, as ultimately decomposition and the work of earthworms will cause the layers to disappear and meld into one another.
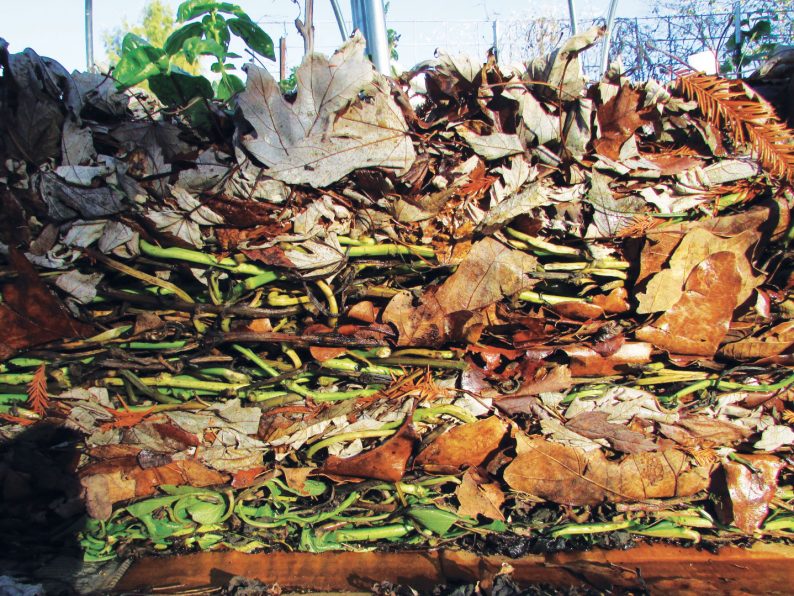
The following layers alternate between green (nitrogen-rich) and brown (carbon-rich) material. Alternating like this promotes decomposition and allows water to penetrate.
Obtaining this material does not need to be expensive. If you have a large yard, you may have a lot of the needed material on hand. Ask neighbors to save you their newspapers and cardboard (friends who have Amazon Prime are a great source of cardboard!) Most are setting this stuff aside for recycling, anyway. Coffee grounds can often be obtained from coffee shops (don’t worry, the filters will biodegrade, too) or neighbors who are caffeine fiends. Horse or chicken owners are usually drowning in manure, and will gladly let you cart it off for free. You can, of course, buy straw and manure if that is more convenient for you.
Materials needed
- Base Layer: Newspapers, cardboard, leaf waste bags, or biodegradable carpet (such as wool or cotton rag)
- Green Layer: Food scraps (avoid meat, fats, and oils), grass clippings, weeds or other green matter (even seaweed—just rinse well first to remove salt), coffee grounds, and manure or barn litter (a mixture of manure and straw – one of my favorites). NOTE: Use only manure from plant-eating animals: cows, horses, goats, chickens. Do NOT use dog poop or cat litter. These can contain harmful organisms.
- Brown Layer: Fallen leaves, straw, marsh hay, shredded newspapers, and wood chips.
Initial bed setup
- Determine where you want to locate your garden bed. The most important consideration is sun. If you want to grow vegetables successfully, you will need a spot that gets at least 6 hours (preferably 8-10 for things like tomatoes) of sun during the growing season.
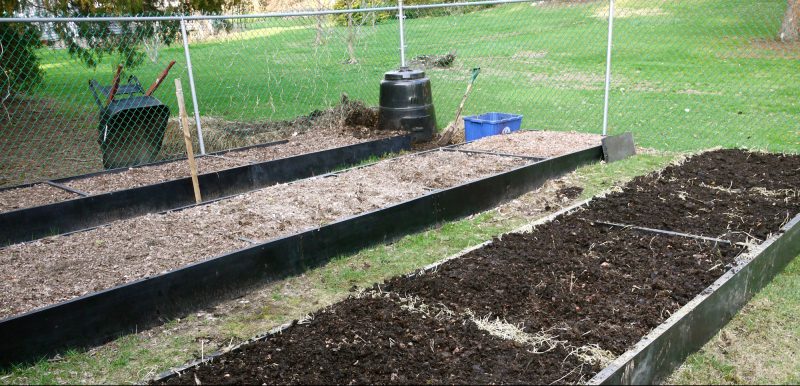
- Decide whether you want one large garden bed, or smaller beds separated by paths. While this method can work for a large bed, I recommend setting up smaller beds separated by paths, for ease of access and to avoid compressing the bed by walking on it. These smaller beds can be any length you like, but keep them to a maximum of about 4 feet wide, so you will be easily able to reach into the center. Laying down cardboard on the paths can keep weeds from growing on them and keep your feet cleaner in wet weather. If you want very high beds (3-4 feet) you’ll probably want to use some kind of sides. There are many materials that can be used for this, but avoid pressure-treated lumber if you are planting vegetables. It contains toxic chemicals that will leach into the bed.
- Water the garden area thoroughly. You’ll be putting lots of layers on top of the ground that will soak up rain and irrigation water and keep it from reaching the ground, so you need to start with a good watering. If the ground under the bottom layer is too dry it will not decompose well.
- Lay down your base layer. Lay down overlapping sheets of newspapers (several sheets thick), cardboard, or whatever other material you will be using. Be sure that you are not leaving any gaps between this material. How thick you make this layer is up to you, but be sure that you either soak the material beforehand or keep it thin enough that water can penetrate all the way through it.
- Water the base layer very thoroughly. This may require repeated soakings. If you have time, you might want to do this repeatedly over a few days to make sure it gets really saturated. Be sure to check that the water is penetrating all the way through to the ground underneath. You can make this step easier by pre-soaking your newspaper or cardboard, but that can make it difficult to handle.
- Add a green layer, about 2–4 inches thick. This can be a mixture of things from the green layer list—it does not need to be uniform.
- Add a brown layer, about 4–6 inches thick. Again, this does not need to be uniform. This layer can be fairly coarse, and can include twigs and even small branches.
- Add a second green layer.
- Add a second brown layer.
- Stop here, or continue alternating green and brown layers. You can keep building your bed up until it is as high as you want it. Keep in mind that it will settle over time. For example, if you have back trouble, you might want to build your bed up to be as much as 4 feet high, so you won’t have to bend much when planting or harvesting.
- At this point, you have two choices:
- To plant immediately: Add a 2–6 inch layer of topsoil or compost and plant immediately.
- If you have time: Wait a while for the layers to break down, and then plant. For example, you can prepare your bed in the fall, and then plant in the spring.
Planting
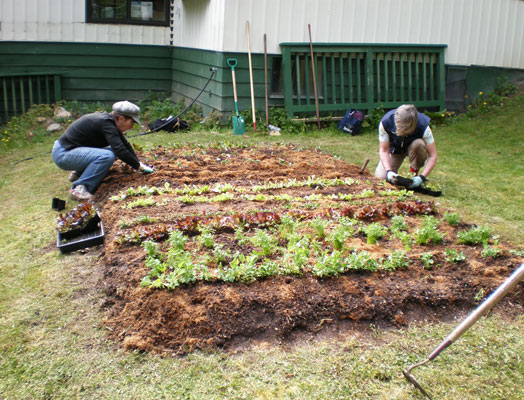
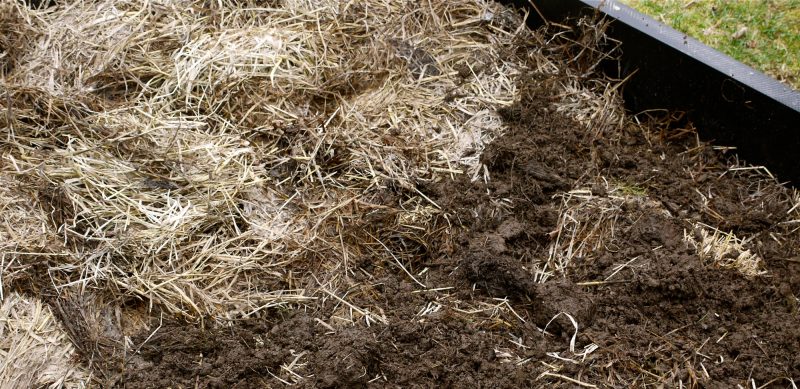
Planting in a lasagna garden bed is easy, because the top layer should be crumbly and loose.
If you plant seedlings, mulch around them with straw or your mulch of choice. You’ll want at least 2 inches of mulch to discourage weeds. Be sure that this layer is loose so that water can penetrate. In addition to straw, dry grass clippings, shredded leaves, pine needles, and nut hulls are good choices for this top mulch layer. Contrary to popular wisdom, using oak leaves or pine needles as mulch will not usually acidify your soil. NOTE: Do not use hay, which is different from straw. Straw does not contain seeds, but hay does, and you will end up growing hay in your garden!
If you sow seeds directly in the bed, wait until the seedlings are several inches tall before mulching them.
During the growing season
During the growing season, your lasagna beds will be fairly maintenance-free. There may be a few weeds, but they will be easy to pull from the loose soil, and there will be many fewer of them than in a conventional garden. No tilling or hoeing is required! You may want to freshen the mulch from time to time, but that’s about it.
Watering
Because the layers are naturally good at retaining moisture, you should not have to water much, unless it is exceptionally dry. If you do need to water, the top layer of mulch can sometimes cause the water to run off, so using a soaker hose laid under the mulch is probably a better option. You can also use ollas or plastic milk jugs with holes poked in them for crops like melons that need a steady supply of water.
Maintenance
Once you have set up the lasagna bed, maintenance is very easy. At the end of the growing season, add a few new layers, starting with the stalks and leaves from vegetables like tomatoes, cucumbers, beans and melons. As the material in the lower layers decomposes, your garden bed will shrink in height, so if you want to keep it high for ease of access, you’ll need to keep adding layers.
Are there any disadvantages to the lasagna gardening method?
Limited to annual plantings
The lasagna method is intended for use with annual plantings, such as vegetables or annual flowers. It is not good for existing perennial gardens. Plant roots need oxygen, and each plant has a depth at which it is adapted to grow. Adding thick layers to these will only smother the plants that are there.
Pests
If you live in a wet climate, this method can attract slugs to your garden, as they like a moist environment, and the lasagna layers are very good at holding moisture. There are numerous natural ways of controlling slugs in your garden, so this is a problem that is easily dealt with.
Initial effort
Once established, a lasagna garden takes very little effort, but the initial set up does take some work. If you are creating a large garden, you will be moving a lot of green and brown matter for the layers, and laying down the base layer does take some care and required bending down or kneeling at ground level.
Need to store organic matter during growing season
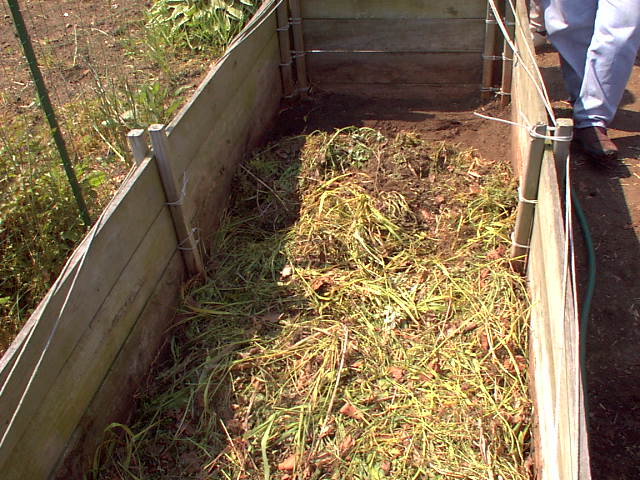
You can’t really add layers to the lasagna garden during the growing season, so you’ll need a place to store the materials for the green and brown layers until the fall or spring. You can use a traditional compost pile for this purpose, and then just use the compost as part of the layering.
Can only be used outside in beds
Sorry, indoor gardeners, this method is only good for outdoor gardening. It can, however, be used with a cold frame or inside a greenhouse. It is also not good for container gardening, which usually uses fairly small containers. You want a bed that is at least 2 ft. by 2 ft. to make this method work.
Avoid contaminated grass clippings and manure
If you are using outside sources for material for your layers, be sure that you make sure that they are free of pesticides and herbicides, especially if you are trying to garden organically.
Conclusion
If you are growing vegetables or annual flowers, give lasagna gardening a try! The upsides of the method really outweigh the downsides, and provide a nutrient-rich environment for your plants with minimal work during the growing season.
Although the lasagna method is not really appropriate for shrubs, trees, and perennials, mulching is a great way to keep them healthy, so that aspect of the method can be adapted.
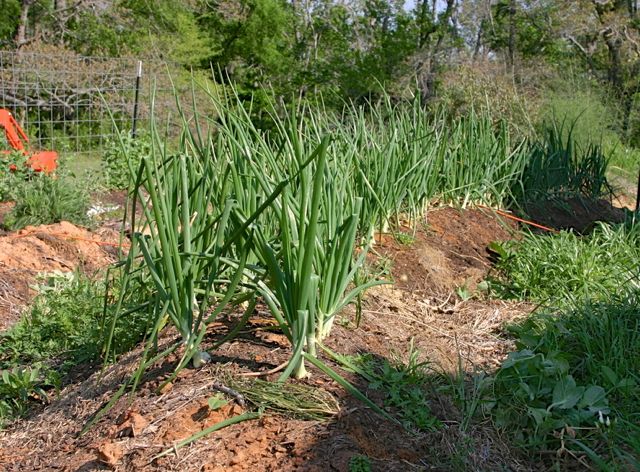
With a bit of effort ahead of time, you can enjoy bountiful harvests in a weed-free garden, with no need to fertilize. Most people who try it are astonished how much bigger and healthier their vegetable plants are, and at the increase in yield.



No Comments