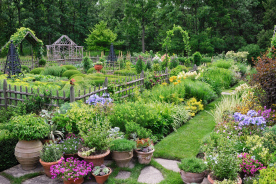
Summer is a busy time for a gardener. Late summer, especially, can feel overwhelming when your fridge, counter, and pantry are full of tomatoes, zucchini, green beans, potatoes and more. What do you do if you can’t eat all the vegetables you grow? Often, people, freeze, refrigerate or give them away to friends and neighbors. Another option is to preserve them so that you may enjoy them when tomatoes and cucumbers are no longer in season.
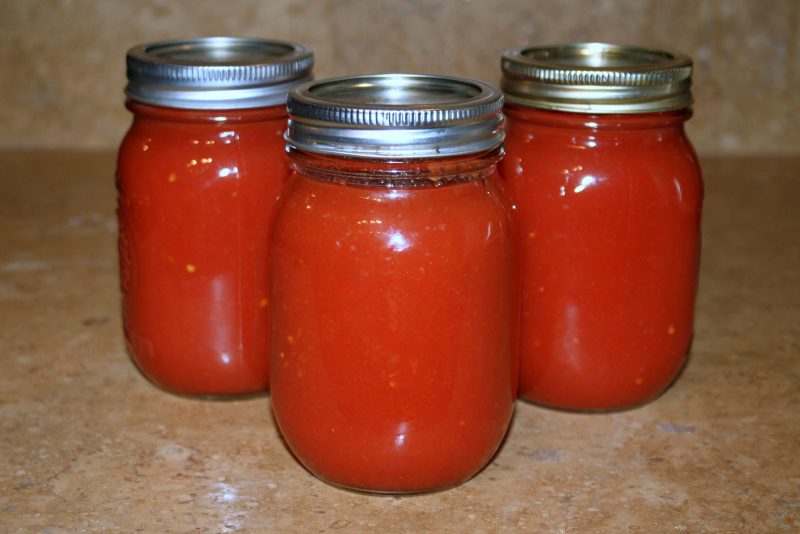
There are many options for preserving vegetables, such as freezing, drying and canning. Canning is not the first one that comes to mind very much anymore, but it is a method that deserves consideration. Canning food is the method of placing food in a glass jar then applying heat to remove air, create a seal, and stop natural spoilage. Once seen as a tedious process best left for grandmas, canning food offers a tasty way to preserve food for later use. It does take a little preparation and planning, but once you try it you’ll be hooked on the convenience and delight of opening a jar of garden tomatoes in January.
Equipment
Canner
There are two methods of canning that can be done at home. Those are water-bath canning and pressure canning. Water-bath canning consists of a large metal kettle complete with a rack and lid. If you don’t have space for a large kettle, or don’t wish to purchase something new a large cooking pot can be substituted. Just be sure it has a tight-fitting lid, can cover the jars with at least an inch of water, and a rack can be used (to lift the jars out).
Pressure canning consists of a large pot, rack for lifting and holding the jars, tight-fitting lid with vent, dial or gauge, and safety fuse. Pressure canners heat food to 240 degrees Fahrenheit and hold it there as long as needed.
Jars
Canning jars have been tempered and are able to withstand the heat and pressure inside a canner and have threaded mouths to seal with the canning lids. Always use standard canning jars. Before using jars always inspect for cracks or chips and discard jars if any are found.
Lids
The lids of canning jars consist of a flat metal lid that have special built-in sealing compound. A metal band screws the lid on and holds it in place in the water. Lids are used only once (they cannot be resealed). Bands can be reused several times unless they are bent or rusty.
Other
Along with the jars, lids, and canner it is handy to have a wide-mouth funnel, jar lifter, food mill, and strainer. A jar-lifter will help pull the jars out of the hot water. A wide-mouth funnel is handy when packing food in the jars without getting food on the rim of the jar. A food mill and strainer are helpful when making sauces.
General Steps
When using either the pressure canner or the water-bath canner the general steps are the same. Food is packed into jars by either the cold pack or the hot pack method. In the cold pack method raw food is packed in sterilized jars then topped with boiling water, juice, or syrup. In the hot pack method food is partially cooked before being packed into sterilized jars and covered with cooking liquid.
For either method begin by washing the jars in hot, soapy water. Pour boiling water over the jars and let them stand in the water until ready to use.
If they jars will be used in a recipe in which they will processed (in the canner) for less than 10 minutes they need to be placed in boiling water for 10 minutes after washing instead of boiling water being poured on them. This will sterilize the jars and make them safe for use.
The lids and bands also need to be sterilized. Screw bands can be boiled for 10 minutes. The lids should not be boiled, but added to simmering water for 10 minutes.
Fill your canner with water and bring to a boil. This will take a while so don’t forget to start it now.
Prepare the food using a pre-selected recipe. Be sure to only prepare as much food as the number of sterilized jars will hold. Recipes will indicate how many jars are needed. Follow the recipe closely.
When the food is ready place hot jars on a clean cloth to prevent slipping. Pack the food in the jars using a wide-mouthed funnel. Do not get food on the rim of the jar and be sure to allow for headspace in the jar. This is the space from the top of the food to the top of the rim. Food that is packed to the top of jar without headspace will not allow the lids to seal properly.
Remove trapped air bubbles by pushing a spatula or other utensil down the side of the jar. You may need to add more liquid to maintain the proper headspace.
Wipe the rim with a clean cloth and add the lid and screw band. Tighten until secure. Place jars on the rack in the canner making sure cans don’t touch. Lower the rack and replace lid. Leave the jars in the canner as long as the recipe calls for.
When jars are finished processing remove from the rack and place on a clean towel. Be sure to leave a one-inch gap between the jars to allow for air flow. As the jars cool you should hear the pop of each jar as the lid seals. This is a happy sound.
After the jars have cooled completely press the center of the lid to ensure the seal is intact. This may take up to 24 hours. If you are unable to press the middle of the lid down it is sealed. If the lid gives and bounces it is not sealed. The food can be reprocessed in another clean jar and new lid or be stored in the refrigerator or freezer. It will need to be reprocessed within 24 hours. If stored in the fridge it will last for 2-3 days.
Label the jars with the date and use within one year. Store jars in a cool, dark place. The bands can be kept on the jars once the lids are sealed or removed to use for other jars.
Water-Bath Canning Specifics
Water bath canning is best for high-acid foods such as tomatoes, fruits, fruit juice, jam, jelly, fruit spreads, pickles, relishes, salsas, chutneys, vinegars, and condiments. Some things, like tomatoes, may need added acid to make it safe for storage.
Begin by bringing water to a boil in the canning kettle. Prepare the food and syrup, if needed, and sterilize jars. When food has been packed, according to the recipe, add the lids and bands. Place the jars on the rack in the canning kettle when the water is boiling. Lower the rack, replace the lid and begin the timer.
Jars should be an inch lower than the surface of the water. If the water in the canner is too low add additional water. If the water in the kettle stops boiling, stop the timer, turn up the heat and resume timer when the water begins to boil again. When timer runs out, remove jars and cool on a clean, dry towel or rack. Check seals when completely cool.
Pressure Canning
Pressure canning is appropriate for low-acid vegetables, meat, poultry, seafood, soups, stews, stocks, and beans. Because these foods are low in acid they need a special process and handling to prevent food spoilage.
A pressure canner is able to reach 240 degrees Fahrenheit, 28 degrees hotter than a water-bath canner. High-acid foods are able to be processed in a water-bath canner because the acid prevents bacteria from growing. Low-acid foods need the high temperature of a pressure canner to prevent bacteria from growing and spoiling the food.
Begin by reading the manufacturer’s instructions for your canner. Clean all the parts and ensure they are in proper working order. A dial gauge should be checked yearly for accuracy. Weighted gauges remain accurate. Make sure steam vent is clear before beginning.
Add 2 to 3 inches of water to canner on the stovetop and turn heat to low. Prepare food and fill sterilized jars. Add jars to rack in canner and once the last jar is added replace lid and lock. Turn heat to high.
Steam will begin to pour out the vent. Reduce heat until steam flows in a steady stream for 10 minutes to release all the air from the pressure canner. Close the vent and start the timer when pressure is reached. The heat may need to be adjusted to maintain constant pressure.
Turn off heat and remove it from the stove if able when the time is up. Let the pressure return to normal before removing lid. This may take 30 to 60 minutes. Remove the lid according to manufacturer’s instructions.
Remove jars from canner when able and cool on a rack or dry towel. Check the seals when jars are completely cool.
Tips and Precautions
Always use a tested recipe when preparing food and follow the recipe closely. Canning recipes are carefully tested to ensure food safety. Any deviation can lead to food spoilage.
Inspect jars before use. If food has mold, is foamy or murky, or lid is swollen discard the food. Food should smell appealing when opened. If it doesn’t smell or look right, it should be tossed.
Sometimes liquid may be lost during processing in which case food will not be covered. The food above the liquid may discolor, but is safe for consumption.

No Comments