House plants are a great way to bring the outdoors in and introduce beginners to gardening. If you don’t think you have a green thumb here are three plants that are easy to keep alive and resilient in the most neglectful conditions. The spider plant, jade plant, and snake plant are all great house plants. They can tolerate low light, unpredictable watering, and even inconsistent temperatures.
Spider Plant
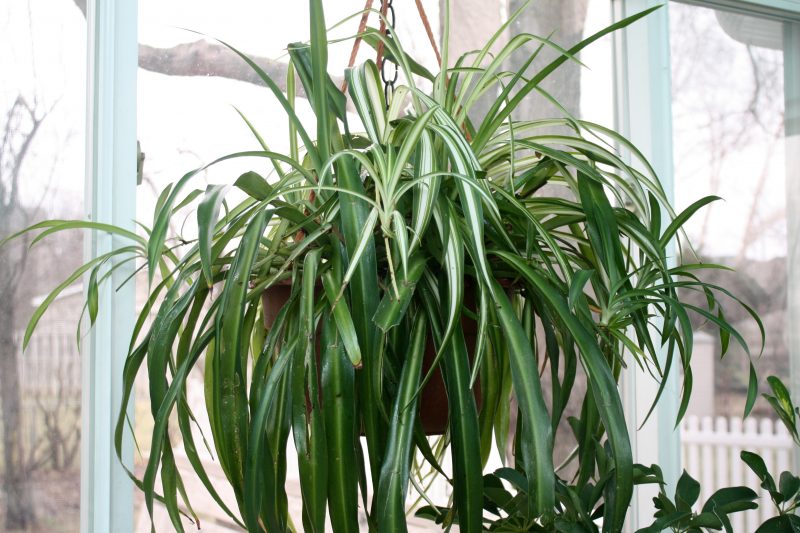
The spider plant, also known as the airplane plant, gets its name from the baby plants that hang from the mother plant and look like spiders. It is a prolific grower and will grow in a large variety of conditions. They grow long yellow or green arched stems that reach up to 3 feet in length, but usually between 2 and 18 inches.
Spider Plant Care
Spider plants are easy to care for and are one of the most low maintenance house plants you’ll find. They need well-draining soil and bright but indirect light that changes with the seasons. Light should be less in the winter and more in the summer. They prefer to remain potted and will need to be re-potted when they grow large enough that roots become visible. Water your spider plant well and be sure the pot has drainage holes so the plant isn’t sitting in water. This can lead to root rot. Spider plants grow best in rooms with average humidity and room temperature. Try to keep it in a room that remains above 50 degrees Fahrenheit.
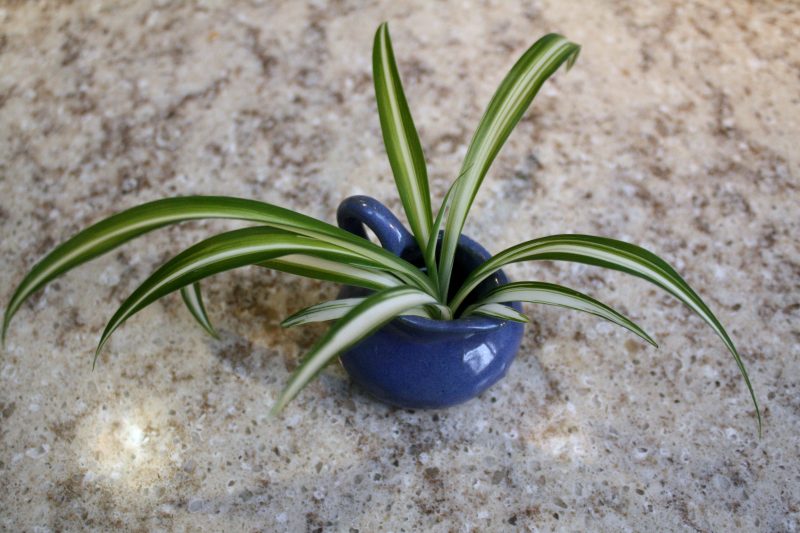
Usually in the spring, or when your spider plant begins to receive more light, it will start producing flowers. If you plant is new it might not produce flowers at first. Only mature plants have enough energy stored up to generate flowers and they are usually so short-lived you might not even notice them. The flowers turn into baby plants, or spiderettes. The baby plants will form roots and eventually new plants in the same way strawberries produce new plants from runners. The baby plants can be left on the mother plant, or they can be used to propagate new plants. For a fuller plant leave the baby plants on the mother plants and allow them to grow roots in the soil next to the mother plant.
Propagating Spider Plants
If you look at the spiderette you’ll notice tiny roots beginning to form. If you wish to start a new plant clip the baby plant from the mother and plant in potting soil. You may also leave the baby attached to the mother and remove it once it has rooted in the soil. New spider plants may also be rooted by adding a baby plant to a glass of water. Once roots have formed plant in potting soil. Rooting spider plants in water is not necessary as they will produce roots when planted in soil, but it can be fun to watch.
How to Grow a Spider Plant Outside
The simplest way to grow a spider plant outdoors would be to move the pot outside during the summer and indoors when it begins to get cold. They look great in hanging baskets with the long stalks and runners hanging down or as the trailing feature of a large container. They are native to South Africa and will survive outdoors all year in a tropical climate. If you live in zones 9-11 you can grow your spider plant outdoors as a perennial. The runners and baby plants make it an excellent choice for ground cover because they spread so easily. Colder zones can grow the spider plant as an annual. If that is the case you can either let it die when the cold comes, or dig it up and repot it for the winter. Plant new plants in well-draining soil in the spring when all danger of frost has past. They are adaptable to varying amounts of water, but will not survive in mud. They will do well in full or partial sun. Water when the soil is dry, but if you forget to water once in a while the plants will survive. If possible, plant in an area that has filtered sunlight, particularly if you live in a very hot climate. They like bright light, but can scorch in direct sunlight.
Spider Plant Fertilization
Spider plants are easy to grow and are very durable despite neglect. They don’t need to be fertilized, but it they will grow better if they are. Fertilizer provides a boost of nutrients to the plant to promote healthy growth. House plants are fertilized to give indoor plants the same growth cycle as outdoor plants and should be feed only during the spring and summer months and then allow it to enter a dormant state in the fall and winter months.
There is not specific fertilizer designed for spider plants; any all-purpose, water soluble, or granular fertilizer will do. It is better to under-fertilize than to over-fertilize as too much fertilizer will cause the tips of the leaves to turn brown. Apply fertilizer once a month according to manufacturer’s directions. If the plant begins to turn brown reduce the amount of fertilizer in half. Pellet or slow-release fertilizer only needs to be applied once at the beginning of the growing season. This will be in the spring when overnight temperatures remain above 50 degrees Fahrenheit. Liquid fertilizer should be applied once a month in the spring and summer.
Diseases and Problems of Spider Plants
Spider plants are rather disease-resistant, but they do occasionally encounter a few problems. The most common problem with spider plants is when the leaves turn brown. This may occur from too much fertilizer or an excess of salt built up in the soil. The best way to remedy this is to re-pot the plant in fresh soil. Reduce the amount of fertilizer used and use distilled water or rainwater rather than tap water to prevent future buildup.
Another problem that may occur with spider plants is root rot or leaf rot. This occurs when the plant is receiving too much water or the pot is not draining properly. Root rot will cause the leaves to wilt, turn brown or yellow and fall out. The roots may become brown or black and will smell. The best course of action to reverse rot root is to remove the plant from the pot and trim away any mushy roots. Once you are left with only firm, healthy roots repot the plant in a new or sterilized plant with fresh soil. You may need to add more drainage holes to your pot.
Jade Plant
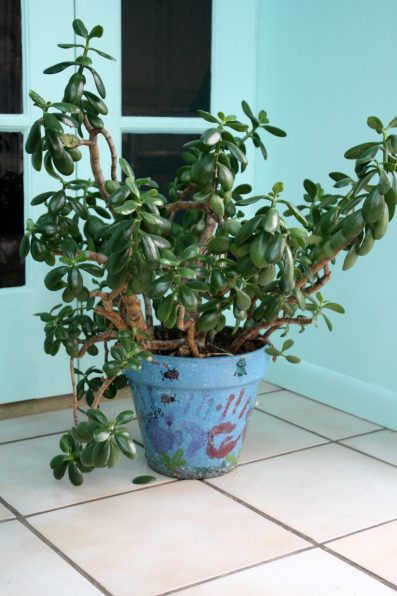
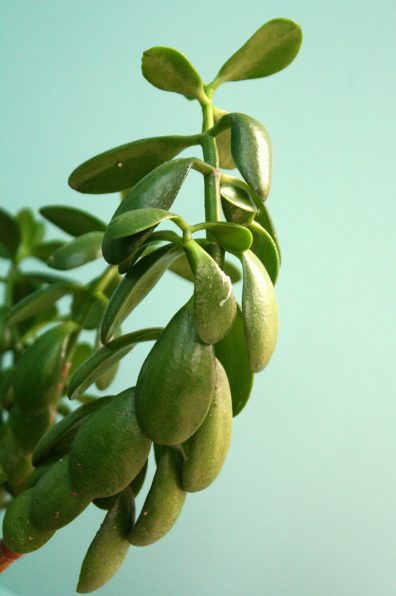
The jade plant is an easy-to-care for plant that is consider by some to be a symbol of luck. It requires a little more TLC than the spider plant, but is still a wonderful plant for beginners. The plant is a succulent and grows fleshy, oval-shaped leaves that grow on thick, water-filled stems or branches. The branches grow thicker and woody with age and can be trimmed or pruned and even used as a bonsai tree.
Jade Plant Care
Proper watering is the biggest concern for a jade plant. Jade plant is a succulent and prefers dryer soil, but don’t let the soil dry completely. Water the plant when the top of the soil is dry to the touch. Too much water will lead to root rot so don’t over water the plant or allow it to sit in wet soil. Use a cactus potting mix to help prevent over watering.
Keep you jade plant next to a window where it will receive at least 4 hours of direct sunlight. It will need full sun to grow properly and if it doesn’t receive enough it may become stunted in growth. Your jade plant should be in a room that is between 65-75 degrees Fahrenheit during the day, and 50-55 degrees Fahrenheit at night. If your jade plant receives a lot of sun, however, they can tolerate higher temperatures.
Fertilize your jade plant twice a year, or once every six months using a water soluble fertilizer. Do not add the fertilizer to dry soil as it may damage the roots. Instead add the fertilizer when you normally water your plant. With proper care a jade plant may grow as tall as 5 feet indoors and even taller outdoors.
Pruning your jade plant is optional, not required; it is not necessary to keep the plant healthy, just to help manage its size or for aesthetic purposes. Because it is such an easy plant, it may grow large enough that pruning is needed. If your plant is older and overgrown, then it should be trimmed. Never remove more than 20 to 30 percent of the plant’s branches. Trim the branch to the nearest node, or where the leaves grow on the branch. This node is where new branches will grow from. Be sure to use clean, sharp pruning shears. Shears that are dull may damage the plant, and dirty shears may introduce disease. If you need to completely remove a branch cut it so the cut is flush with the trunk. Pruning is best done in the spring or summer so the plant can recover quicker while it is actively growing. You can use the branches you’ve removed to propagate new plants.
Jade Plant Blooms
Jade plants are mostly known for their thick, fleshy leaves. They can, however, form small white or purple, star-shaped flower clusters. Jade plants typically only begin to flower when they are several years old. Even then, it can be a bit difficult to get flowers, as the conditions need to be perfect. Jade plants prefer an arid environment and the indoors can often be too humid. You will need to move your plant to a dry area and withhold water for flowers to form. Be sure to only do this to mature plants, young ones won’t flower.
Jade plants usually flower when the days become shorter, in the winter. The plant doesn’t enter a dormant state, but does require a rest period and a bit of extreme conditions (lack of water and cold) before it flowers. To help your jade plant flower move it to a cool place, 50-60 degrees Fahrenheit, in the fall when the days begin to get shorter. It should still be located in a place that receives direct, bright sun. Be sure to keep your plant above freezing. Stop watering it during this time and do not fertilize. Flowers will begin to form during the shortest days of the year and will bloom in late winter or early spring. Flowers will be short-lived. Trim back the stalks when the flowers die and the stalks become brown. You may begin to water you plant again at this time. If you don’t care for flowers leave your plant indoors year round.
Grow Jade Plant Outdoors
The jade plant is native to South Africa and is considered an ornamental shrub. When grown outdoors it can reach up to 6 feet in height and 4 feet across. You can grow it outdoors as a perennial if you live in Zones 10a-11. It won’t tolerate outdoor temperatures below 40 degrees Fahrenheit. For most of the country, however, jade plant can only be grown outdoors in a pot during the summer.
Move your indoor jade plant outdoors in the summer when all danger of frost has passed. Keep your plant in a bright place, but avoid direct sunlight as it may scorch. Water your plant when the surface of the soil feels try to the touch. Jade plants need new, fresh soil every 3 years. They don’t mind being over-crowded, however, so they don’t often require bigger pots. Repot after the flowers have faded and before the plant is moved outdoors for the summer. Fertilize in the spring and summer months.
Propagating jade plant
Jade plants are easily propagated from a cutting of a leaf or stem. If your plant is larger it is best to use a branch or stem. Pruning is an excellent time to do this. Make sure the branch you choose for rooting is healthy and free from disease. The branch should be 3 to 4 inches in length and be sure to use a clean, sharp knife or pruning shears. Place the branch in a dry, warm place to allow the cut end to dry and scab over. This usually takes between one and two weeks. If you try to root the trimmed branch before it has dried it may become infected. Once the branch is dry plant it is cactus potting mix and water sparingly until the soil is damp. Make sure is only remains damp until roots begin to form. After this point you may begin to water as normal.
If you have a smaller plant and wish to start a new one you may do so by rooting a leaf. Select a healthy leaf and trim it from the plant using clean, sharp pruning shears. The leaf should be removed as close to the branch as possible. Lay the leaf on the top, not inside, of potting mix and water until the soil is damp. The leaf will begin to form roots and should be watered sparingly until this happens. Once the leaf has taken root it will begin to form a new plant; this may take between 2 weeks and 2 months. When the new plant is two to four inches tall you may begin to water as normal.
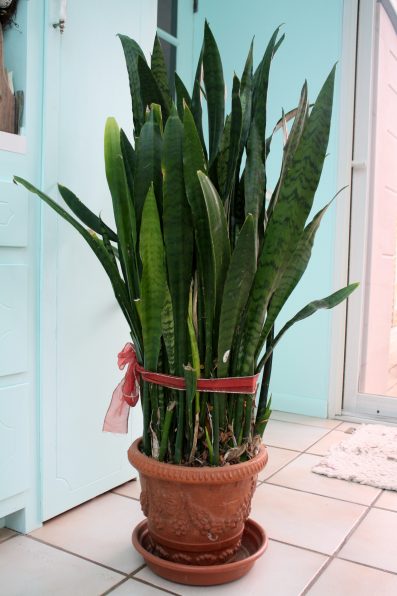
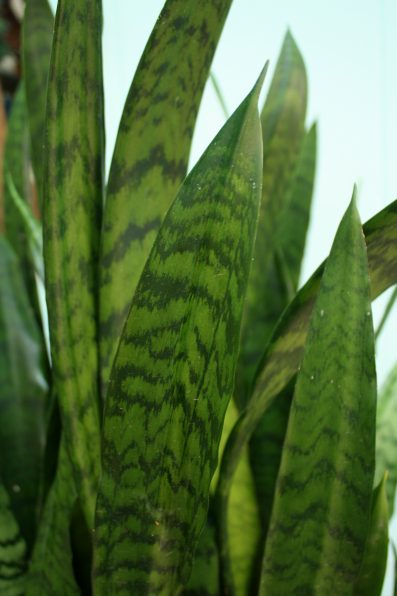
Snake Plant
The snake plant is one of the most tolerant plants a person can grow inside. Also called mother-in-law’s tongue this interesting-looking plant features long, stiff, upright leaves that are shaped like swords and may be banded or edged in yellow or white. The snake plant is known to improve air quality and with its modern-looking architecture it is a great addition to any home.
Snake plant care
The snake plant is very easy to care for. It can be neglected for weeks and still look fresh. It is is pretty flexible in its light and humidity requirements, however, it is specific in its water needs. The easiest way to kill a snake plant is to overwater it. Be sure the soil is well-draining as the snake plant does not tolerate wet feet which may lead to root rot. Water the snake plant when the top inch of soil is dry. When watering make sure the water is room-temperature. Use distilled water or rain water if you can.
It is one of the best low light plants available, but grows faster in bright light. Place your snake plant near a window and turn your pot a quarter turn weekly so the plant is evenly exposed. It grows best in temperatures between 70 to 90 degrees. Fertilize once a year in the spring with liquid fertilizer if you wish.
Snake plants should be potted in planters that are wider than they are tall because the root system of the plant is shallow. Use a pot that is the same diameter or a little larger than the plant currently is. The plant prefers smaller pots and thrives with overcrowded roots.
Propagate snake plant
Snake plants are pretty easy to grow and even easier to propagate. Create new plants for friends of neighbors for an easy and simple gift.
The easiest and quickest way to propagate a snake plant is by dividing it. The plant grows from rhizomes which grow and multiply and they grow older. Rhizomes look like roots, but are actually a modified stem. When your plant gets too big for its pot separate the plant at the base using a clean, sharp knife then repot the sections. Unless your plant is old and has a lot of rhizomes only separate the plant into two sections. You need three rhizomes and one good leaf to start a new plant.
Another way to propagate snake plant is by leaf cuttings. Select a healthy leaf and trim the tip with clean shears. The cut tip should be two to three inches long. Place section in a cup and add water so that the cut end is covered with water. The cup should be placed in a location so the leaf receives indirect sunlight. Change the water every couple days and roots should begin to form within a week or two. Once roots form pot the new plant in well-draining potting soil.
You can also propagate a new plant from a leaf cutting by skipping the water. Once you have your leaf cutting lay it in a dry place to allow the trimmed edge to form a scab or callus. This will take one to two days. Once the end is dry plant the cutting in potting soil that is damp. Don’t overwater and the cutting will root itself in a couple weeks.
Grow snake plant outdoors
The snake plant is native to Africa, and India in tropical environments. It can be grown outdoors in the United States as a perennial in zones 9b-11. They do not tolerate frost at all so if you live in a colder climate keep your plant in a pot so you can move it outdoors for the summer and indoors for the winter. The snake plant does not tolerate temperatures below 40 degrees Fahrenheit, so only move your plant outdoors when the overnight temperatures consistently remain above 50 degrees F.
If you live in a tropical climate you may plant snake plant any time of the year. Snake plants tolerate a variety of soil conditions, but it otherwise needs to be well-draining. Locate the plants in full or partial sun with lots of bright light. The more light it receives the healthier it will be. Water should be applied sparingly and only enough to moisten the surface of the soil. Soil should be dry to the touch before watering again. Fertilize in the spring and the end of the summer with liquid fertilizer. Snake plants are generally pest-resistant, but may occasionally attract slugs or snails.
No Comments